Usenet – still alive

In times of Facebook, Google and YouTube, why should it still be necessary to
rely on outdated technology like Usenet/NNTP? Portals like phpBB also invite you
to exchange ideas with other users.

So why should you use Usenet these days?

From my point of view the question is very simple: It is a tried and tested
standard, similar to emails/SMTP, it hasn’t really changed for decades. Some
people may interpret this as a disadvantage, but for me it is clearly an
advantage because I don’t constantly need new programs to write articles and I
don’t always have to worry about having to enter my login data with the latest
web browser version. There are also many people who still use Usenet on a daily
basis.

Of course, you can’t just add colorful pictures to the content and you have to
significantly increase your brain power to put everything into
words. Ultimately, discussions with substance arise here – plain text-based and
highly optimized.

I use Usenet in combination with Emacs and Gnus – it also fits seamlessly into
my email communication and allows me to work productively.

Prevent password query for SSH access on client side

Especially with automated scripts which establish SSH connections to external systems, the request for a password within the script is undesirable or leads to the script being blocked.

It is possible to simulate such password entries with the expect tool, but this is anything but secure. The best way is authentication via RSA keys, which must be entered as a public key in the target system in order to enable password-free access.

If you administrate many systems and have forgotten to import a public key into a target system, you end up with the problem of the blocked script again because a password query is initiated as a failover.

To prevent this, the -o BatchMode=yes parameter is simply passed to the SSH client. It is generally recommended to use this parameter as soon as ssh appears in a script. As a rule, however, it is not considered and prevents many a system from running automated processes.

A typical command-line will look like this:

ssh -o BatchMode=yes www.my-sample-hostname.com

If you use SSH indirectly via Rsync, this parameter can be used as follows:

rsync -av -e "ssh -o BatchMode=yes" www.mysample.com:/src1 /dst1

Convert images to a single video using ffmpeg

There are several approaches here. The order of the images is problematic. The easiest way would be by:

cat *.jpg | ffmpeg -f image2pipe -r 25 -vcodec mjpeg -i - test.mp4

A warning is issued here because the pipe is aborted and ffmpeg does not seem to be able to recognize this.

Another method would be via image names which contain a sequential counter in the file name. If this is not the case, the file names can be changed as follows:

#!/bin/bash
COUNTER=1
for i in *.jpg; do
NEW_FILENAME=$(printf "%04d.jpg" "$COUNTER")
mv -i -- "$i" "$NEW_FILENAME"
let COUNTER=COUNTER+1
done

The video can be created using:

ffmpeg -start_number 1 -i %04d.jpg -vcodec mpeg4 test.avi

In this case, the 4 fixed numerical digits on the left are filled in with 0. If the number is higher, the mask %04d must be changed accordingly.

Test the IO performance of hard-disks/disks using Linux

Measurements by means of dd

Measure writing performance. This test can also be used with CIFS and NFS and
is relatively objective:

dd if=/dev/zero of=temp.bin bs=1M count=1024 conv=fdatasync,notrunc

The parameter fdatasync only ends the =dd= command when the data has been
completely synced. Instead, you could also use oflag=dsync which also takes
caches into account and waits until they have been written.

To test without a buffer, we recommend the parameter oflag=direct using dd. In addition, the write cache of the disc should deactivated using:

hdparm -W0 /dev/sda

It can be re-activated using:

hdparm -W1 /dev/sda

The reading performance can be obtained with the command


time dd if=/tmp/test.bin of=/dev/null bs=4k

bs should be matched to the source drive.

Before doing read tests, it is recommended to flush the read cache:


echo 3 | sudo tee /proc/sys/vm/drop_caches

In all tests, where caches play a role, the RAM’s performance is of course
also decisive!

Determine data throughput

This point complements the information above, but comes from a different
source:

if=/dev/zero of=/tmp/test1.img bs=1G count=1 oflag=dsync

Determine latency

This point complements the information above, but comes from a different
source:

dd if=/dev/zero of=/tmp/test2.img bs=512 count=1000 oflag=dsync

Measurements using hdparm

To test the performance of the cache, hdparm can be used.

hdparm -Tt /dev/sda

Using -t the performance of buffered read accesses is determined. This test
primarily determines the performance between disk, kernel and chipset
including system caches. The optional parameter --direct bypasses system caches and shows the direct data throughput between disk, kernel and chipset.

With -T the read cache is tested, this test does not make hard disk access because it only reads from the Linux buffer cache.

Generate spectrograms with arecord, sox and ffmpeg/avconv

Create a spectrogram (Image)

The following command records a WAV file using ALSA (Device 2.0).
In this example, Sox is piped into the process — which is actually unnecessary in this case — but could still be used to apply various filters to the resulting test.wav file:

arecord -D hw:2,0 -r 32000 -f S16_LE -c 1 -t wav | sox -t wav -c 1 -L -b 16 -r 32000 - test.wav

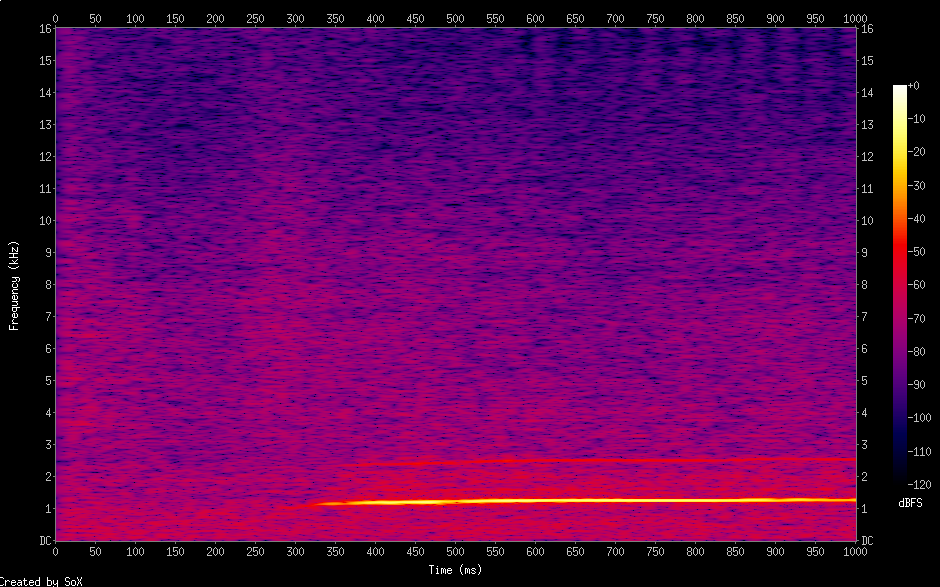
Now, using the newly created test.wav file, a spectrogram can be generated:

sox test.wav -n spectrogram -o image.png

The following command creates a WAV file using Alsa (Device 2.0). In this
case, Sox is additionally piped, which is completely unnecessary here,
however, Sox could still add various filters to the resulting test.wav
change:

arecord -D hw:2,0 -r 32000 -f S16_LE -c 1 -t wav | sox -t wav -c 1 -L -b 16 -r 32000 - test.wav

Using the file test.wav that has just been created, a spectrogram is now generated:

sox test.wav -n spectrogram -o image.png

A similar spectrogram image can be created directly from a video file using avconv:

avconv -i test.avi -lavfi showspectrumpic=s=hd480:legend=0,format=yuv420p out.png

Create a spectrogram (Video)

The following instruction creates a spectrogram from a video test.avi. This is saved as a video under the name out.avi.

Instead of avconv, ffmpeg could also have been used. The Debian version does not currently support all parameters here.

Alternatives with MPlayer and Sox

You can also generate a spectrogram from a video using mplayer, or a combination of mplayer and sox.

First, extract a WAV file using mplayer:

mplayer test.mp4 -ao pcm:file=/dev/stdout -vo null > test.wav

Then generate the spectrogram:

sox test.wav -n spectrogram -o test.png

Comparing Spectrograms

Spectrograms created this way can be directly compared.
However, even with seemingly identical WAV files, this comparison can be tricky.

To make differences more visible, creating a spectrogram diff is recommended.

First, create a diff WAV file:

sox -m -v 1 source1.wav -v -1 source2.wav diff.wav

Then generate the spectrogram diff:

sox diff.wav -n spectrogram -o diff.png