Individual files can also be transferred using netcat. To do this, the following instructions must be used on the transmitter and receiver:
On the receiver:
nc -l -p 8888 -w 5 > dest < /dev/null
At the sender:
nc servername 8888 < source
Explanation: The recipient starts a server service based on the first parts, which reacts to requests on TCP port 8888. With the instruction > dest the content of received data is written to a file name dest.
The file transfer is started on the transmitter by entering the second instruction. Here a connection with the server servername via port 8888 is initiated and the file source is transferred.
The file is transmitted unencrypted and uncompressed. Using tools like gzip and openssl this could be implemented transparently.
The parameter fdatasync only ends the =dd= command when the data has been completely synced. Instead, you could also use oflag=dsync which also takes caches into account and waits until they have been written.
To test without a buffer, we recommend the parameter oflag=direct using dd. In addition, the write cache of the disc should deactivated using:
hdparm -W0 /dev/sda
It can be re-activated using:
hdparm -W1 /dev/sda
The reading performance can be obtained with the command
time dd if=/tmp/test.bin of=/dev/null bs=4k
bs should be matched to the source drive.
Before doing read tests, it is recommended to flush the read cache:
echo 3 | sudo tee /proc/sys/vm/drop_caches
In all tests, where caches play a role, the RAM’s performance is of course also decisive!
Determine data throughput
This point complements the information above, but comes from a different source:
To test the performance of the cache, hdparm can be used.
hdparm -Tt /dev/sda
Using -t the performance of buffered read accesses is determined. This test primarily determines the performance between disk, kernel and chipset including system caches. The optional parameter --direct bypasses system caches and shows the direct data throughput between disk, kernel and chipset.
With -T the read cache is tested, this test does not make hard disk access because it only reads from the Linux buffer cache.
Firstly, during the Steam setup, I’m acting as the user tester. Any other user can be used instead of tester, but in that case, all path references in this documentation must be adjusted accordingly.
First, download the official Steam installer from their website. This will place the file steam.deb in the downloads folder.
If you unpack this Debian package, you’ll find the necessary files under the directory =/CONTENTS= (unpacking with Midnight Commander is very simple: select steam.deb and press Enter). The files you should see are:
/usr/bin/steam
/usr/bin/steamdeps
/usr/lib/steam/bootstraplinux_ubuntu12_32.tar.xz
The last file can be named differently under certain circumstances. Below /usr/lib/steam (within steam.deb!) There should be only one file.
All three files are now e.g. copied to /home/tester/steam/bin (This directory must be created beforehand!) Then the following steps are carried out as user root:
Now change to the directory /home/tester/steam/bin and call the file steam:
cd /home/tester/steam/bin
./steam
If packages are still missing, they are now displayed in a separate window (missing packages are installed as above, the package names displayed by Steam can be adopted 1: 1) Otherwise, the execution of the Steam application begins, which usually starts with the Update of own binaries begins. Ultimately, the usual Steam window appears where games can be started and installed.
Addendum: The way described above does not create any desktop icons and otherwise Steam is NOT integrated into the existing desktop environment via GUI but has to be started manually as stated above.
The following command records a WAV file using ALSA (Device 2.0). In this example, Sox is piped into the process — which is actually unnecessary in this case — but could still be used to apply various filters to the resulting test.wav file:
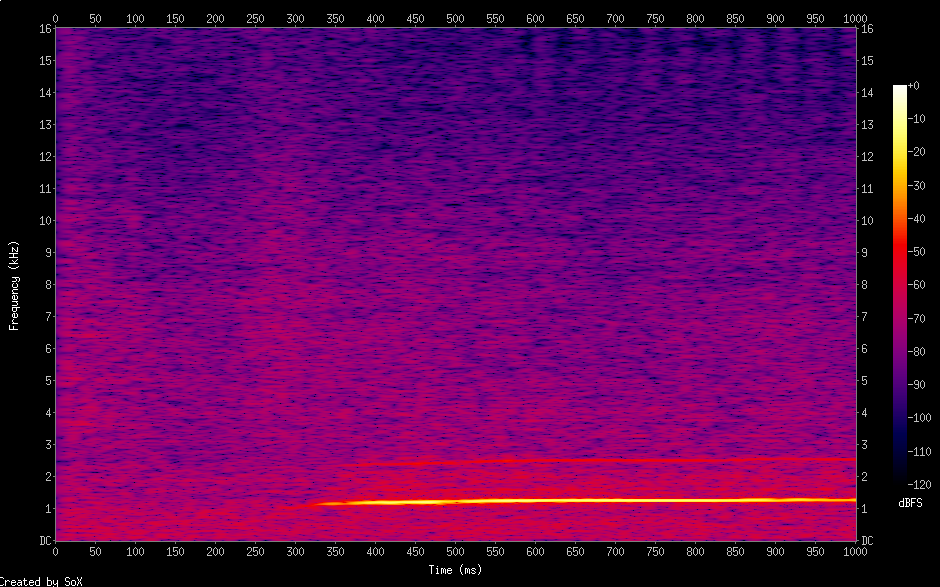
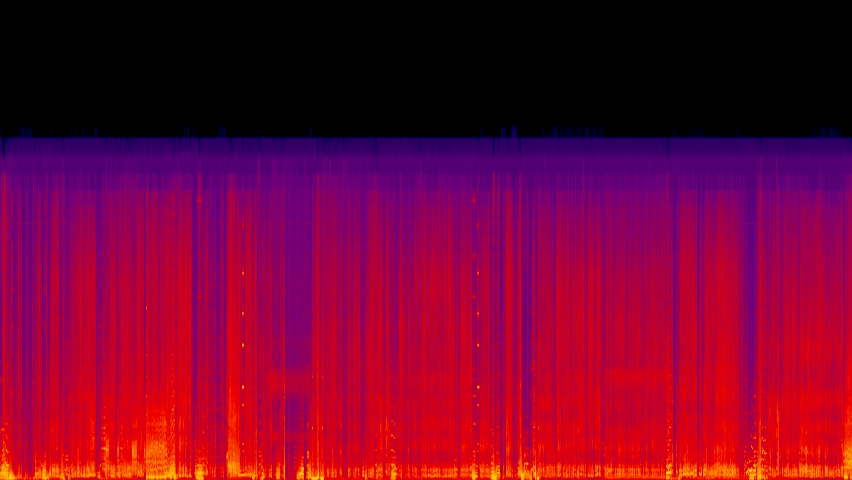
Now, using the newly created test.wav file, a spectrogram can be generated:
sox test.wav -n spectrogram -o image.png
The following command creates a WAV file using Alsa (Device 2.0). In this case, Sox is additionally piped, which is completely unnecessary here, however, Sox could still add various filters to the resulting test.wav change: